
Craft Your Own Lederhosen
| Step | Details |
|---|---|
| Materials Needed |
|
| Choosing the Right Pattern |
|
| Cutting the Fabric |
|
| Sewing the Main Pieces |
|
| Decorative Elements |
|
| Fitting Your Lederhosen |
|
| Care Instructions |
|
Lederhosen are more than just a costume; they’re a vibrant symbol of Bavarian heritage. Rooted in tradition, these stylish shorts were once worn by farmers and craftsmen. Today, they take center stage during Oktoberfest and other festive gatherings around the world, celebrating German culture with flair. The intricate designs and rich textures reflect craftsmanship that has stood the test of time.
As DIY fashion continues to gain momentum, more enthusiasts are turning to personal creation over mass production. Crafting your own lederhosen allows you not only to embrace this cultural symbol but also to express your individuality. With each stitch, you can infuse your unique style into a beloved tradition. Whether you’re preparing for an upcoming Oktoberfest celebration or simply looking to expand your crafting skills, making lederhosen can be a rewarding project that blends creativity with meaningful craftsmanship. Ready to dive into this exciting journey? Let’s get started!

Materials Needed
When it comes to crafting your own lederhosen, choosing the right materials is crucial to both the authenticity and functionality of your final garment. Traditional lederhosen are typically made from high-quality leather, often cowhide or goatskin, which provides durability and a classic look. If you’re new to sewing with leather, consider starting with a pigskin or synthetic suede alternative for ease of use while still capturing that beloved feel. For accents or linings, cotton or wool fabrics can serve as excellent choices, providing comfort against the skin.
To gather these materials, you don’t have to go far! Many local fabric stores carry an assortment of leather and cotton options, but if you’re looking for specialty supplies, check out online retailers like Tandy Leather or Mood Fabrics. For embellishments such as traditional embroidery threads or decorative buttons, stores like Joann Fabric and Craft Stores often have sections dedicated to embellishments that will bring your lederhosen to life. Remember to stock up on essential tools: sharp scissors specifically designed for leather cutting, heavy-duty needles compatible with your sewing machine, and thread suitable for thick fabrics are indispensable.
Once you’ve secured your primary materials, let’s talk about optional embellishments that can elevate your design! Adding features like ornate embroidered patterns along the hems or cuffs brings not only aesthetic appeal but also pays homage to vintage styles found in Bavarian culture. You might choose contrasting colors for embroidery thread that align beautifully with the color of your leather base—think deep greens paired with golden yellows or bright reds. Other ideas could include incorporating decorative buckles on suspenders or perhaps even personalized patches that symbolize something meaningful to you.
In summary, assembling quality materials sets the foundation for your lederhosen crafting journey. Focus on high-quality fabrics that’s authentic yet manageable for your skill level while considering unique embellishments that reflect your personal touch. With these essentials gathered together in one place, you’ll be well-prepared to embark on this exciting DIY adventure!
Choosing the Right Pattern
When embarking on your lederhosen crafting journey, selecting the right pattern is a vital step that can significantly influence the final product’s look and fit. Lederhosen come in various styles, from knee-length traditional designs to modern cuts that offer a more contemporary twist. For example, if you’re looking to replicate the classic Bavarian style for Oktoberfest or a historical costume event, opt for patterns featuring intricate detailing like embroidery or decorative buttons. On the other hand, a streamlined design may better suit those who prefer a less ornate appearance while still enjoying all the charm of this unique garment.
Before settling on a specific pattern, consider adjusting it to accommodate different body types. Lederhosen should fit comfortably and allow ease of movement; therefore, modifications may be necessary to achieve an ideal fit. Pay attention to elements like waist measurements, length adjustments, and leg openings. If you have wider thighs or prefer a looser cut around the legs for comfort, ensure your pattern reflects these adjustments. Remember that adding some seam allowance when cutting the fabric can give you more flexibility during fitting.
To successfully create your own pair of lederhosen, taking accurate measurements before starting is essential. Use a cloth measuring tape to measure waist circumference, inseam length, hip size, and thigh width precisely. It’s helpful to wear clothing similar to what you plan on wearing under your lederhosen when measuring for a better gauge of how they will feel once assembled. Document these measurements carefully as they will guide you through choosing whether your selected pattern requires alterations and how best to approach cutting out each piece of fabric in line with your vision.
Choosing the right pattern sets the foundation for not only achieving aesthetic appeal but also ensuring your handmade lederhosen provide maximum comfort and durability. Embrace this creative journey by treating each step—including pattern selection—as an opportunity to infuse your personal style into this culturally rich garment!
Cutting the Fabric
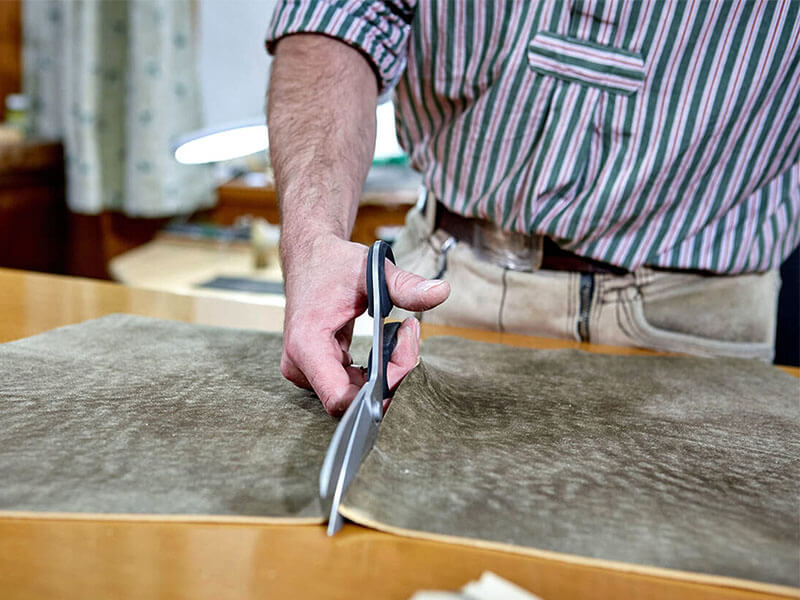
Once you’ve selected your desired pattern for your lederhosen, it’s time to cut the fabric with precision. Start by laying out your fabric on a large flat surface, ensuring it’s smooth and free of wrinkles. Use a rotary cutter or sharp fabric shears to make clean cuts along the edges of your pattern pieces. To ensure accuracy, consider using weights to hold the pattern pieces in place instead of pins, as this will minimize distortions while cutting. Always double-check that you’ve aligned the grainline of the fabric properly with your pattern; incorrect alignment can severely affect fit and comfort.
Minimizing waste is an essential consideration during this process. First, take advantage of any remnants from your fabric by planning how to position each pattern piece thoughtfully on the material. For instance, if you’re incorporating pockets or decorative trims, think about where those elements can fit in without needing additional yardage. A clever placement might allow you to use leftover scraps for smaller sections or even a matching accessory! This not only helps in keeping costs low but also makes for a more eco-friendly project.
Before making any cuts, ensure all your pattern pieces are properly prepared. This includes transferring all markings like darts or notches accurately onto the fabric through methods such as chalk marking or using tailor’s tacks if you’re dealing with thicker materials. These markings are vital for aligning pieces correctly when sewing them together later on. Taking these preliminary steps ensures that each element lines up beautifully; you’ll thank yourself later when stitching everything into place becomes smoother and more enjoyable!
Lastly, don’t rush through cutting—take it slow and steady! Ensuring each piece is cut accurately will save you time and frustration down the line during assembly. Remember, this step sets the foundation for all subsequent work; investing attention here pays off immensely in achieving a polished final product that can be proudly worn at gatherings and festivities alike!

Sewing the Main Pieces Together
Now that you’ve successfully cut out your fabric, it’s time to bring your lederhosen to life by sewing the main pieces together. The first step in this process is understanding basic sewing techniques that will be crucial for assembling your garment. A solid foundation of straight stitches will serve you well—using a sturdy sewing machine with a needle appropriate for thicker fabrics like leather or canvas is essential. Many sewists recommend practicing on scraps before tackling your project to ensure you’ve mastered the tension and stitch length required for strong seams.
Durability is key when constructing lederhosen, especially since they endure plenty of movement, moisture, and even hearty frolics at Oktoberfest! To ensure that your seams withstand the test of time, consider using a double stitch or reinforcing stress points with an additional line of stitching. It’s also wise to use polyester thread instead of cotton; polyester offers greater strength and resistance against abrasion, which makes it ideal for high-wear areas like the crotch and pockets. When piecing together parts like the legs or waistband, pinning them carefully before sewing can help keep everything aligned as you work through each section.
Adding extra features can elevate your lederhosen from something ordinary into a unique statement piece! For instance, incorporating pockets might seem like a small detail but adds immense functionality during events where you want to keep essentials close at hand. Attach deep side pockets hidden within seams for a sleek appearance while ensuring they are secured with reinforced stitching. If you’re feeling adventurous, consider adding suspenders—these not only provide additional support but can showcase some personality through distinctive patterns or colors.
Ultimately, this stage can be immensely rewarding as individual components merge into a cohesive design through your careful craftsmanship. By applying precise techniques and focusing on durability while infusing personal touches into features like pockets and suspenders, you’ll be well on your way to wearing proudly crafted lederhosen!
Adding Decorative Elements
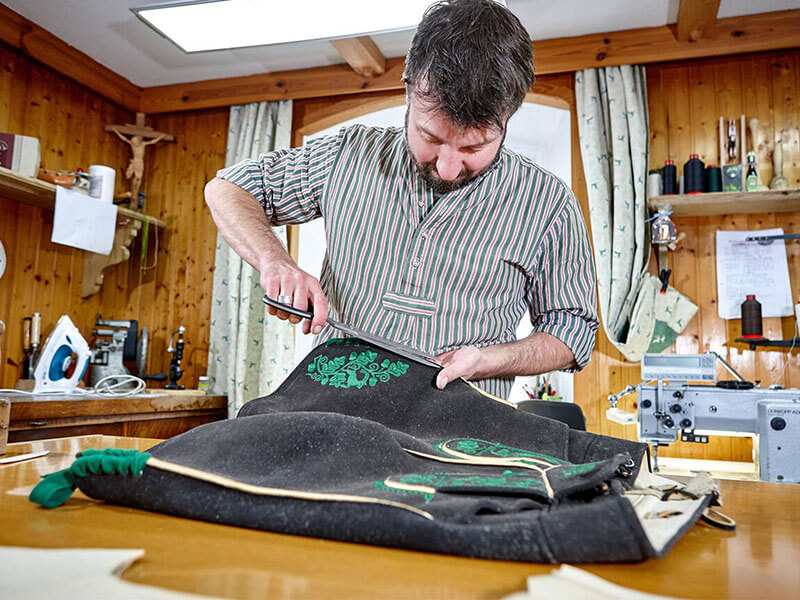
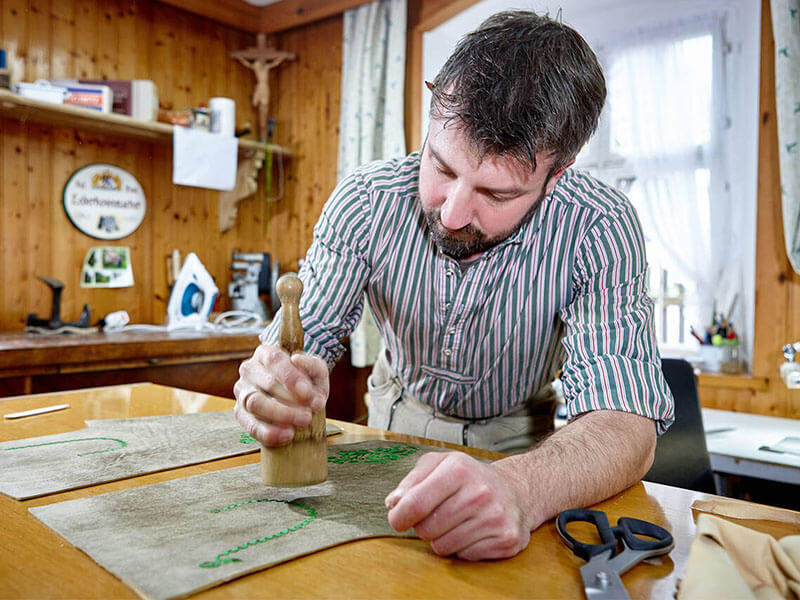
Once you have successfully sewn the main pieces of your lederhosen together, it’s time to bring your creation to life with decorative elements. Traditional lederhosen are often adorned with intricate embroidery featuring floral patterns or hunting motifs that reflect their Bavarian origins. You can find inspiration in historical designs or choose to create a unique pattern that resonates with your personal style. Whether opting for classic techniques like cross-stitching or experimenting with modern methods such as machine embroidery, these embellishments will elevate your lederhosen from casual to extraordinary.
Personalizing your outfit can make it truly one-of-a-kind. Consider incorporating elements that tell a story about who you are—maybe embroidering the initials of family members, significant dates, or even symbols representing meaningful experiences. Fabric paint is another popular option for customization; use it to add hand-painted motifs or designs for a more artistic touch. Don’t shy away from mixing materials either; adding contrasting fabrics as pocket liners or using leather patches can give your piece an eclectic flair while sticking true to its heritage.
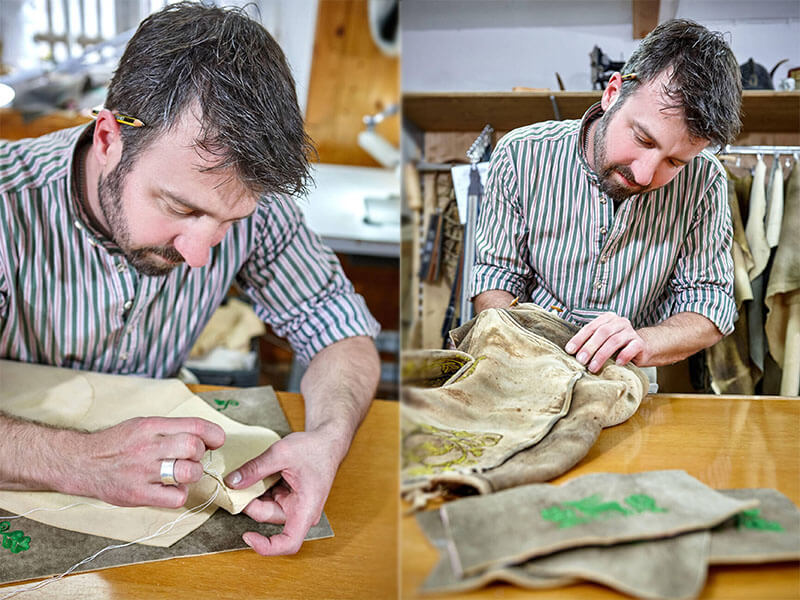
When applying these decorative elements, pay attention to detail and craftsmanship. If you’re venturing into embroidery, ensure that every stitch is neat and consistent to achieve a professional look—practice on scrap fabric if needed! To prevent fraying and maintain clean edges when working with appliqués or additional layers, use a sharp pair of fabric scissors and consider finishing seams with zig-zag stitches. For those going the route of fabric paint, test on a small area first to gauge how the paint interacts with the leather before committing to larger areas.
Incorporating decorative touches shouldn’t feel daunting; rather, think of it as an opportunity for creative expression! As you layer different textures and colors onto your lederhosen, remember that these embellishments not only enhance aesthetic appeal but also contribute depth and character to the garment itself. Enjoy experimenting and let your imagination guide you as you blend tradition with personal artistry!

Fitting Your Lederhosen
After you’ve meticulously crafted your lederhosen and added those beautiful decorative touches, the fitting process comes into play. Fitting is crucial to ensure that your garment drapes comfortably and looks stylish. A well-fitted pair of lederhosen not only enhances comfort but also allows for freedom of movement, especially if you’re planning to partake in dancing or other festivities at Oktoberfest. Don’t be shy about trying them on multiple times during this phase; it’s normal to make adjustments as needed.
One common technique for modifying fit involves taking in the side seams or adding darts at the waistband. If you find that your lederhosen feel loose around the waist, you can easily create pleats for a more tailored look— while still maintaining that traditional aesthetic. If excess material is present at the thigh area, consider tapering down the leg openings slightly for a sleeker profile, ensuring that you retain an authentic shape without sacrificing style. Remember, small adjustments can have a big impact!
Once you’ve made all necessary alterations, it’s essential to focus on finishing touches such as hem lengths and securing any remaining threads or untidy edges. For instance, if you opted for decorative stitching along the hems or pockets earlier, add these features now to frame your adjustments beautifully. A final pressing with an iron can help smooth out any imperfections caused during construction and will give your newly crafted lederhosen that polished appearance.
Finally, don’t forget about wearing options after fitting! Consider pairing your lederhosen with complementary shirts, shoes, and accessories to complete your outfit for its upcoming debut at Oktoberfest or similar events. Not only will a proper fit enhance comfort and function during festivities, but it will also showcase the craftsmanship behind your creation—allowing you to proudly strut in style!
Care Instructions for Your Lederhosen
Caring for your custom-crafted lederhosen is essential to preserve their quality and longevity. Unlike typical fabrics, leather requires specialized treatment to avoid damage. The best practice for cleaning lederhosen is to avoid machines altogether; instead, opt for manual cleaning methods. Use a damp cloth to gently wipe down the surface of the leather, removing dirt and sweat that may accumulate over time. For deeper cleanings, consider using a leather cleaner specifically formulated for use on delicate materials. This will help maintain the natural oils in the leather while ensuring that your garment remains fresh.
Proper storage is equally important in maintaining your lederhosen’s shape and texture. Always hang your lederhosen on a wooden or padded hanger to prevent creasing and deformation; avoid wire hangers, which can leave unsightly marks or even damage the fabric. It’s also wise to keep them out of direct sunlight or heat sources, as this can lead to fading over time. To protect against dust and potential insects, store them in a breathable cotton garment bag rather than plastic—this will ensure ventilation without trapping moisture.

Getting Ready for Oktoberfest
With your beautifully crafted lederhosen now complete, it’s time to style them up for Oktoberfest festivities! Accessories play an incredibly crucial role in achieving that authentic look associated with Bavaria’s famous celebration. Consider pairing your lederhosen with traditional accessories like embroidered shirts or checked flannel tops; these not only complement the leather but also add depth to your outfit. A sturdy pair of comfortable shoes—such as Bavarian-style loafers or boots—will round out the ensemble perfectly while providing comfort throughout all-day celebrations.
To elevate the festive flair further, don’t forget about hats! A classic Tyrolean hat adorned with a feather and other embellishments not only ties the look together but also serves as a nod to tradition. You might include playful touches such as themed pins or badges on your outfit, representing various aspects of German culture or personal milestones from previous Oktoberfests you’ve attended. As you prepare for themed gatherings leading up to Oktoberfest—whether hosting at home or joining events elsewhere—think of incorporating shared activities like polka dancing or beer tastings that reflect Bavarian heritage and foster camaraderie among friends and family alike!

Embrace Your Crafting Journey
In conclusion, crafting your own lederhosen is a rewarding and creative endeavor. We walked through selecting the right materials, choosing a pattern that fits your style, accurately cutting fabric, and expertly sewing the pieces together. Don’t forget the fun embellishments and final fitting touches! Each step adds to the unique character of your garment.
So gather your materials and let your creativity flow! Enjoy the process of bringing tradition into modern DIY fashion. Remember, every stitch reflects your personal touch. Whether it’s for Oktoberfest or just for fun, you’ll wear your handmade lederhosen with pride. Happy crafting!
FAQ’s:
What are Lederhosen?
Lederhosen are traditional Bavarian short leather pants, typically worn by men in Germany and Austria, especially during cultural festivals like Oktoberfest. They are often made of durable leather, with suspenders and embroidery, reflecting centuries-old craftsmanship.
What materials are used to make Lederhosen?
The most common material for Lederhosen is high-quality leather, typically sourced from goat, deer, or cowhide. Deer leather is considered premium due to its softness and durability, while cowhide is stiffer and more affordable. Other materials like wool, cotton, and embroidery threads are used for details and lining.
Can I make Lederhosen at home?
Yes, you can make Lederhosen at home if you have basic sewing skills and the right tools. However, working with leather requires specific tools like leather needles, heavy-duty thread, and a sturdy sewing machine or hand-stitching techniques. Detailed patterns are also essential to guide the construction.
Where can I find patterns for making Lederhosen?
Patterns for Lederhosen can be found online through specialized clothing design websites, craft stores, or even at traditional shops in Bavaria or Austria. Some websites offer downloadable or printable patterns, while others sell pre-made kits.
How difficult is it to sew Lederhosen?
Sewing Lederhosen can be challenging, especially for beginners. Leather is thicker and less forgiving than fabric, which can make it hard to sew by machine. Hand-stitching may take more time but offers better control over details like embroidery or seam finishes. With patience and practice, it’s possible to create a beautiful pair of Lederhosen.